
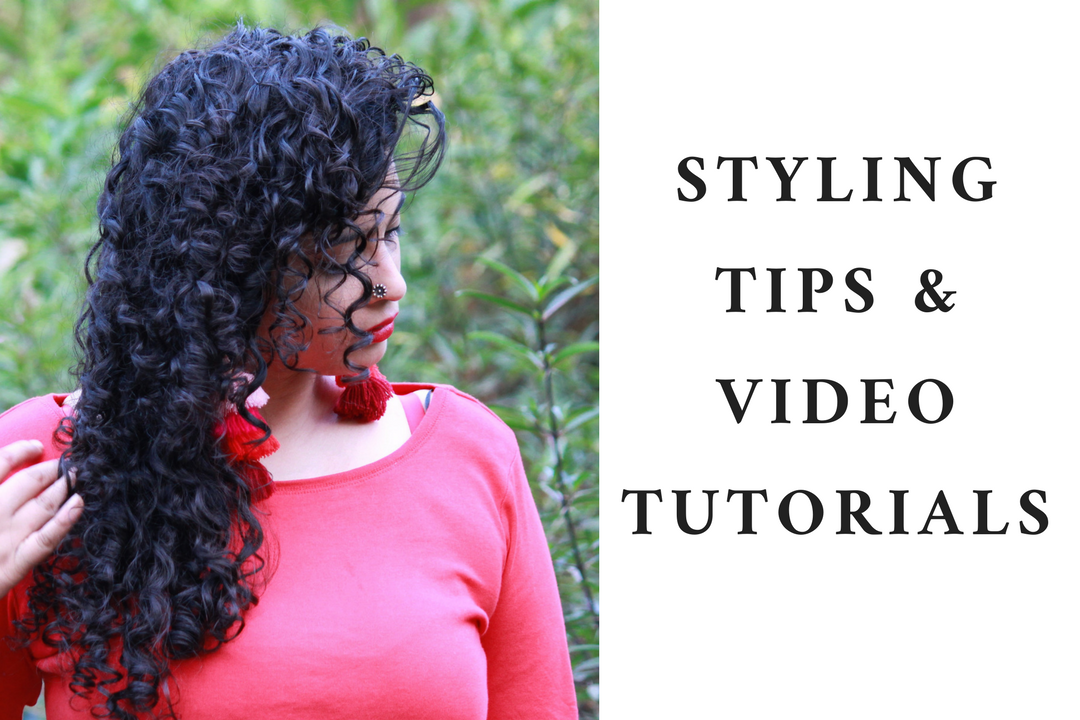
The key to a good, no strike that, great hair day when you have curls or waves is proper styling. It makes your texture pop & heads turn. It keeps you from needing to wash it too often and complaining about poofiness and frizz. Read on to discover my ultimate guide to styling wavy curly hair with more than 15 different techniques!
Over the years spent in the curly hair universe on Naturally Curly, YouTube etc, I have found that there is no ONE perfect way to style curly or wavy hair. With different hair types, density, porosity & thickness, YOU need to find what suits your own texture. So don’t get too caught up in one technique & feel disappointed when it doesn’t work out.
Look below for a thorough primer on different techniques wavy & curly hair people across the world use to style & try them out a couple of times! You never know which one might suit you the best. 🙂 As for my readers who have asked how I style my curls, I have also included a video tutorial which you will find below under the Denman brush method. This is going to be a long post, so if you find yourself getting impatient, bookmark it & keep coming back to read it in chunks!
So let’s get started!
Pin This

Accessories for Styling Curly Hair
A wavy or curly hair woman’s arsenal of products is often huge! Some of the items listed below however are optional, for e.g, I personally need a light, water based leave-in-conditioner, a curl cream AND gel for flawless curls (even while having low porosity curls) but many do just as well with one or two products.
You Might Need:
- Leave in Conditioner (Read this post on the importance of a Leave In)
- Volumising Mousse (Great for wavy hair – Type 2 & even 3A)
- Curl Enhancing Product- Curl Cream and/or Gel – Helps in hold & frizz
- Curl Butter (Great for coily, coarser textures)
- Oil (Lighter oils like Almond, Jojoba if you have low porosity hair or JBCO/Coconut Oil if you have high porosity hair. I’m currently using this yummy oil & loving it)
- Wide Toothed Comb and/or Narrow Toothed Comb or Denman Brush (My Go-To)
- T Shirt/Microfiber Towel – A normal towel will leave your hair frizzier
- Hair Dryer With Diffuser (Helps in distributing air uniformly)
- Satin Scarf/Bonnet/Buff
- Spray Bottle
Prepping Your Curls For Styling
It is ESSENTIAL that you wash your hair well in the shower. Use a gentle shampoo (preferably CG Approved– free of sulphates, silicones & alcohol) to cleanse the scalp & build-up from previous products or if you have stopped shampooing completely, use a conditioning cleanser (called co-washing). It is best to detangle your curls gently with a good moisturising conditioner, first with your fingers & then a wide-toothed comb. Rinse off completely (what I do) or leave some in (in your hair, not the scalp). If you have wavy hair, I recommend you try this technique called Squish To Condish.
And remember, make sure your hair is still wet when you get ready to style.
Tips To Style (Irrespective of the method you choose)
- Style on Wet Hair – You will find more frizz when you style damp or dry hair
- Section Your Hair – This will help in uniform product distribution
- Comb away from scalp – Reduces a flat crown
- Style your hair upside down – Helps in curl formation at the roots
- Protect Your Hair at night
- Hands Away Approach – No touching until it dries fully & even then, avoid. You’ll encourage frizz.
Choose Your Styling Technique
Ah, the meat of the article. I have listed all the methods I have seen on Youtube over the years & some I read recently in The Curl Revolution. Like I said earlier, different methods suit different wavy & curly heads or perhaps, even a combination of them. I have linked a video below each method which explains it best. Watch & try it a couple of times to see what works for you.
Scrunching
Great for creating volume, bounce & definition. In this technique, you take sections of your hair in your palms and squeeze or crumple in an upward direction. You can either take your styler/leave in conditioner of your choice, rub it between your palms & then scrunch up the sections or take a tshirt & scrunch upwards after you have applied the products with another styling method. The latter is what I do. This is great if you’ve done Squish to Condish in the shower too.

Praying Hands/Smoothening
Take your leave in/styling product & rub it across your palms and smooth it over your strands from the top to the bottom, with hands clasped, as if in a prayer. I often use this while applying a gel to my curls.
Raking
Section your hair to ensure even distribution. Take your leave in conditioner/ curl cream in your palms & rake it in, i.e, finger comb through the strands. Next, smooth the section next to encourage them to clump back together. Do the same with a gel if you include one in your routine. Asha has a great video on this so watch how she rakes in below.
Shingling (By Miss Jessie’s)
This is SO popular among Natural hair Youtubers! Especially 3 B/C & Type 4 textures since it increases length and gives a lot of definition to your curls. The best way to learn this is visually so watch the video below by Jewjewbee (one of my favs).
Using Combs/Denman Brush
If you have thin hair like me, you might like several tiny curl clumps instead of a few big ones. After applying my leave in, curl cream & gel with praying method, I rake in & then use my denman brush to comb through. You can also use a wide toothed comb (big clumps) and/or narrow comb (smaller clumps) to get similar results. Do note that using Denman has given me THE best definition till date.
Rake & Shake (Ouidad)/Run & Swift (By Curl Expert Christo)
I found these listed separately in the book – The Curl Revolution by Naturally Curly but found no difference between them. The Rake & Shake, created by Ouidad is more popular though or perhaps more widely known and used amongst the curl world. In this, after Raking, you take a section between your finger and shake it in a left-right direction. Watch the video below by Curly Penny (she’s super hilarious) to understand better.
Clumping ( Bounce Curl’s method)
Actually, any method to get the curl strands to form clumps is called clumping. If you want smaller clumps, use technique 5. If you want thicker clumps, wet your hair, either with a spray bottle or under a tap & then clump the sections together. I like how Mismmo, the owner of bounce curl does it- After applying her products, she take sections of her hair along the length in her fist & squeezes to form clumps.
Super Soaker (By CurlTalker Rudeechick)
Remember what Squish to Condish is? Super Soaker is similar – the only difference is in STC you use a conditioner & is done during your hair wash & in SS you use your styling products & this is AFTER you’re finished washing! This is another styling method that I’ve heard great things about by people who have wavy hair. Anjana also has a very detailed post on this, you can learn more here: Super Soaker method for promoting curl clumps.
Finger Curling/Twirling/Coiling
I would LOVE to have the patience & time to do this. You can do this method throughout the entire hair or like me, to a few sections that refuse to curl like the rest (you know those sneaky ones!). Once your hair is wet, freshly styled with your products either with raking or combing through, take a small section of hair on your index finger & twirl it around till you reach the end. Continue doing this until every section is done. If a section gets dry by the time you come to it, simply re-wet it with a spray bottle. Finger coiling damp on dry hair won’t have the same result. There are several videos on this but the one below by Luhsetty is my favourite.
Jump Rope Curls/Skip Curls (By Jonathan Torch)
A great way to encourage spirals, or change the structure especially in wavy hair, this technique needs to be done on wet, completely detangled hair. After applying your leave in, take a gel with strong hold & smooth it on a section. Twist the section around your finger, starting from the root, just like how we learnt in Finger Coiling above. Slide your finger down to the end & start ‘skipping’ the strand, the way you use a jump rope. After the strands have dried, you can SOTC (explained in another method below) & separate a few sections as desired.
Smasters ( By Smasters467)
Another favourite in the wavy hair community & those with looser curl patterns! Here’s what you need to do – with wet hands, take half of what you would normally use of your styling products & rake it in on wet hair. Scrunch scrunch scrunch! Diffuse/Air Dry till curls or waves are 50% dry. Re-apply the remaining 50% of the styling product again with wet hands. Diffuse again till it’s fully dry! Remember to use wet hands since dry hands with sticky product will cause frizz & separate the strands. Also, check out this video by real life+curly girl below. I’ve only recently been led to her site & god, I LOVED her videos & tips! If you’re a wavy hair girl, do check out her channel as well!
MAP or Magicurl Application Process (By Curl Specialist Scott Musgrave)
I have had to hunt quite a bit to understand the technique since the creator has now included the full method under a paid online course. It comes around Rs. 6000, which is too expensive for me. From what I could find, the method involves a cleanser (to detox scalp), conditioner (to hydrate), filler (to fill porosity & reduce frizz halo) & sealer (foam or gel to create curl formation). Please note that this is NOT the full method, only my understanding of it. If you are interested, head on over to his site & see the results by different wavy hair women & buy the course if you want to learn properly. 🙂
TCM or Tightly Curly Method (By Teri LaFlesh)
TCM is actually an entire process of taking care of your curls just like the Curly Girl Method. Leaving your conditioner in forms the basis of this method. For her styling starts in the shower. After shampooing & detangling while conditioning, she re applies (be very generous with the amount you put) the conditioner to her hair. She uses a denman brush next. She doesn’t rinse this out. After that, she separates strands depending on the size of the curl & smoothes it down (like Shingling) & twists it around. Watch the video below or read up here: Tightly Curly Primer
Clipping
This method can be used in addition to any of the other methods. It is a great way to avoid a flat crown. You will need clips to simply pin the wonky strands on the top after styling. Once dried, you will see the clumps are not sticking to your scalp. Fluff your scalp once it’s dry & watch how big it looks after!
LO/LOC/LCO/LCGO/LOGO
L= Leave in Conditioner
O= Oil
C= Cream
G= Gel
Depending on your hair type, you can figure out the right product cocktail for your natural hair. For me, LCGO, i.e, layering a light leave in conditioner, followed with a tiny dollop of curl cream & then set with a firm gel is how I style. I apply a light oil to my ends in winter & SOTC with the same. You can see my order of application in my curly hair routine below:

SOTC- Scrunch Out The Crunch
This is done post styling when the curls have fully dried & they get a gel cast (your hair will feel little crunchy). To remove it, you simply take a tiny amount of oil in your palms and break the cast by scrunching upwards & fluffing out the scalp.
Styling 2nd/3rd Day Waves & Curls
Making your waves & curls last longer will save time, money AND reduce stress on your hair. It also allows your natural oils of your scalp to get restored. It’s entirely possible to have good hair days without having to wash it each time. Do remember that the no of days you go without washing is also dependent on your texture -wavier hair types tend to lose definition faster than curlier ones. AND, for most, wash days will always the best hair day – It’s just what it is & you shouldn’t worry too much otherwise.
Watch my video to see how I revive my curls & my recipe for a DIY Spray Mix
And done! I hope this guide helps you figure out the best way to style your naturally wavy or curly hair. Did I miss out any technique? Did I explain a method wrong? Let me know with a comment below or drop me an email & I’ll be happy to check it out and add it to the list!
If you have more questions, you can also comment below or head on over to my Instagram, Facebook or Twitter. You can also ask me questions on my facebook page Ask Jalebi.
I also have more videos on my Youtube channel. To properly understand my routine, do watch my tutorials & subscribe to my channel.
Until next time peeps!
Love, Pallavi


17 Comments
Dharshini
atHi Pallavi!!
I am new here. I realised that curly hair have a whole separate set of routine only a month ago. Since then I have been researching. I have seen so many videos and blogs and honestly your blog is the best. Its relatable and very well explained. I am going to start this routine. I just have one problem. I am going to college and i can’t leave my hair open. Can you post hairstyles for curly hair that is safe for the curls?
Thank you so much.
Pallavi Juneja
atThank you Darshini! I’ll try to post the hairstyles. meanwhile, check this- https://in.pinterest.com/curiousjalebi/curly-hair-styles/
debrafarquhar
atReally fantastic guide, thank you for doing all the research and creating this post. After 20+ years of CGM I stillleraned a few useful things. Keep up the good work. Yours in curls, Debra
Pallavi Juneja
atWow, thank you! So glad you liked the blog Debra 🙂
jigi
atThere are no clumps remaining by the end of the first day itself. Its all lose hair already
Pallavi Juneja
atThen your hair is very wavy or fine loose curls – check more posts in the wavy hair section, that should help. 🙂
Priya Arun
atHi Pallavi, Sorry, but a very basic question. So at what point do you decide if you want a side-parting, a center-parting or no parting all? Once I remove the plop, my hair automatically falls into a center parting. So I take the side-parting even before I start applying the products. Am I doing it right?
Pallavi Juneja
atYes you can do that! Do side parting but after it dries, shift it to the other side!
Priya Arun
atThank you, will try that Pallavi.
Rachel
atThank you so much for such an extensive compilation. I’m still figuring out the right application technique for my hair, so this has been enormously helpful.
Pallavi Juneja
atSo glad!
If You Have Wavy Hair, You'll LOVE real life+curly girl's Top Tips!
at[…] The Ultimate Guide To Styling Your Wavy or Curly Hair- Tips & Video Tutorials […]
From Dry to Juicy Curls - My Experience with DIY Avocado Hair Mask
at[…] The Ultimate Guide To Styling Your Wavy or Curly Hair- Tips & Video Tutorials […]
Ecostyler Gel (Pink) Transformed My Curly Hair Routine
at[…] The Ultimate Guide To Styling Your Wavy or Curly Hair- Tips & Video Tutorials […]
Cantu Curl Activator Review & Steps To Use It on Wavy Curly Hair
at[…] The Ultimate Guide To Styling Your Wavy or Curly Hair- Tips & Video Tutorials […]
Nafisa Ahmed
atWow !! I book marked this post !! Great job !! There are so many new techniques which I wasn’t aware of !! Thanks
Pallavi Juneja
atYay! That was the whole point! Let me know which ones worked for you and which ones didn’t!